Project
By Shyam Sunder on September 18, 2025
BeginnerERP Documentation ::
Project ::
We are managing each site's work through a project. And whole site planning from scratch to end is done through a project. This Project is linked to multiple Document like Sales Order, Purchase Order, Blanket Order etc.
Click here to download Project workflow.
1. First Section: Project Details
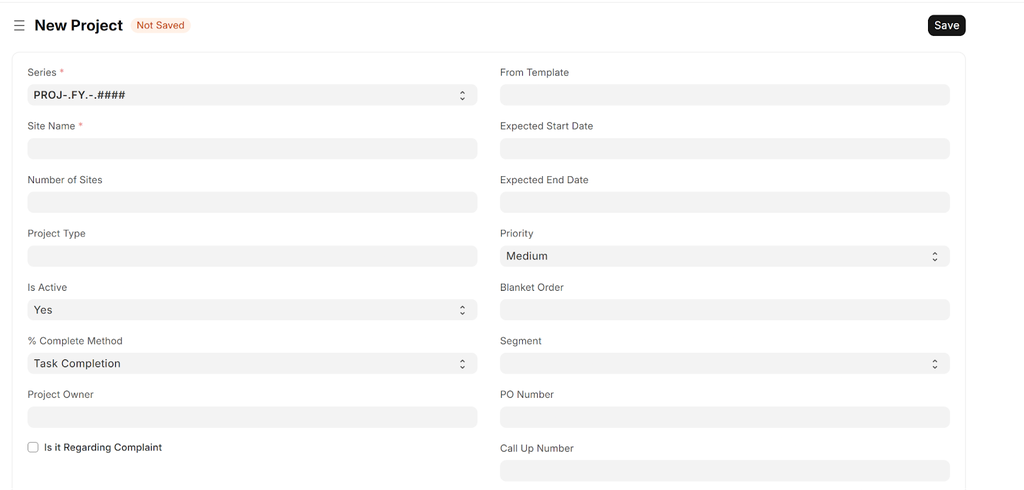
Series: Project name was given according to this series. This is done automatically by system.
Site Name: Name of Project. Originally it was Project Name.
For each site there will be individual projects created.
For example, Jhotwara – A
Jhotwara - B
No of Sites: No of sites like 1, 2, 3, 5 etc.
It should be one, because we are creating one project for each site
For small types of projects, we can use this. Like Bank sign can be 100, 200 etc
But for a big project. It should be one
Project Type: It has currently three options
Internal
External
Other
% Complete Method: It has currently Four options
Manual
Task Completion
Task Progress
Task Weight
Task Completion – Mainly we use this task completion method. In this process task % depend on the number of tasks completed.
Task Progress – In this process task % depend on each task progress, and tasks were entered by the user on each task.
Task Weight – In this process task % depend on each task weight. Like we can give some task at 0.4 weight, some task can have 0.2 weight and some task can have 0.1 weight.
% Complete: It will be calculated automatically according to the task.
Project Owner: Default current user. But can be able to change it
Is it regarding Complaint? Checkbox
This field was added for a previous project, before ERP. It tells that, this project is created as complaints that was accrue on previous project
Project status should be completed, because project is already completed
From Template: Please select template. Now we are using the standard template of all projects. And Its’s tasks are managed by a project stage checklist.
For more info, please see project template documentation.
Expected Start Date:
Expected End Date: This date should be according to the blanket order.
It should be max 45 days for each project
Priority: It has currently three options
Medium
Low
High
Blanket Order: Blanket Order ID
Segment: It will fetch automatically from blanket order.
PO Number: It will fetch automatically from blanket order.
Blanket Order Start Date: It will fetch automatically from blanket order.
Blanket Order End Date: It will fetch automatically from blanket order.
Call Up Number: Select call up no from call up list. It can also be referred to as Release order no.
This was given by clients, tell us we have to start production as soon as we receive a call up number.
Call Up Sequence: It will fetch automatically from call up
Call Up Date: It will fetch automatically from call up
2. Second Section: Project Stage Checklist
According to the project stage, project tasks will be created. So please use this checkbox carefully.

Measurement: Mainly for all the cases.
Estimate / Quotation: Mainly for all the cases.
Sales Order Creation: Compulsory for all the cases,
But we can ignore if a project is created against a complaint or issue.
Material Request Preparation:Material Request Entries are created
Production Stage: All production work are done here
TPI QC (Factory):Third party inspection are done our factory
Dispatch: Dispatch to be done, Team Align with Material this task are created
TPI QC Site (Material): Third party inspection are done at client site
Running Bill:Create sales invoice entries, mainly it should be partial sales invoice
Site Installation: We must get a completion certificate after the site is installed on client location.
TPI QC Site (Installation):Third party inspections are done at the client site after installation.
Warranty: Almost applicable on all sites.warrant terms depend on client wise.
Final Invoicing:Final sales invoice., it may be full payment or remaining payment.
3. Third Section: Dealer/Officer Details :
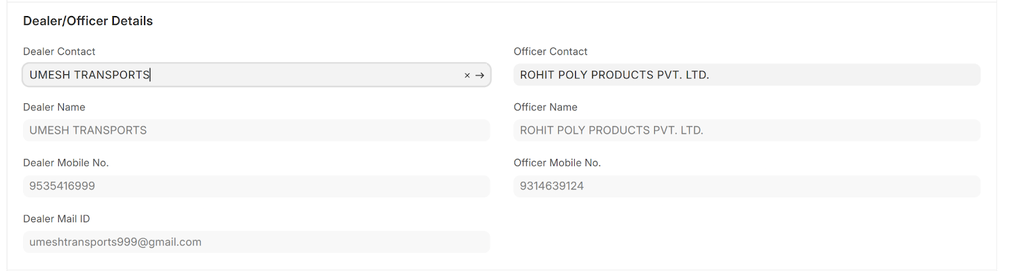
Dealer Contact: Please select dealer contact from contact master. Otherwise create a new contact.
For new contact insert mobile, email and mark them primary.
Dealer Name: Auto fetch from dealer contact
Dealer Mobile No: Auto fetch from dealer contact
Dealer Mail ID: Auto fetch from dealer contact
Officer Contact: Please select officer contact from contact master. Otherwise create a new contact.
For new contact insert mobile, email and mark them primary.
Officer Name: Auto fetch from officer contact
Contact No: Auto fetch from officer contact
4. Forth Section: Customer Details :

Customer: Enter customer name, customer name also fetch by blanket order
Sales Order: If projects are created through sales order, then sales order no are entered here. But in our organization we create sales orders from projects, so we don't use this field.
5. Fifth Section: User Section:

This section is related to website portal users. If we add a website user here, then they can see project info on the erp site. Website users are referred to as clients.
But currently we are not using this feature.
6. Sixth Section: Notes:
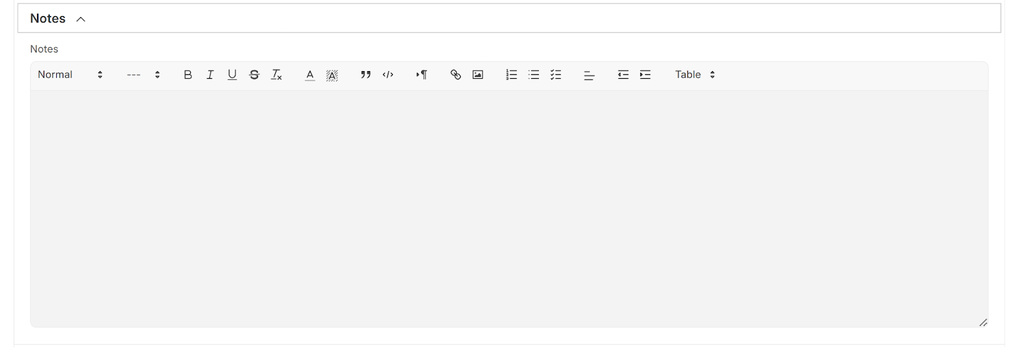
Notes: Optional, notes related to project
7. Seventh Section: Start and End dates :

This section is used for time-sheets. In our organization we are not using it
Actual Start Date: Read-only, auto fill from time-sheet
Actual End Date: Read-only, auto fill from time-sheet
Actual Time in Hours: Read-only, auto fill from time-sheet
8. Eighth Section: Costing and Billing :

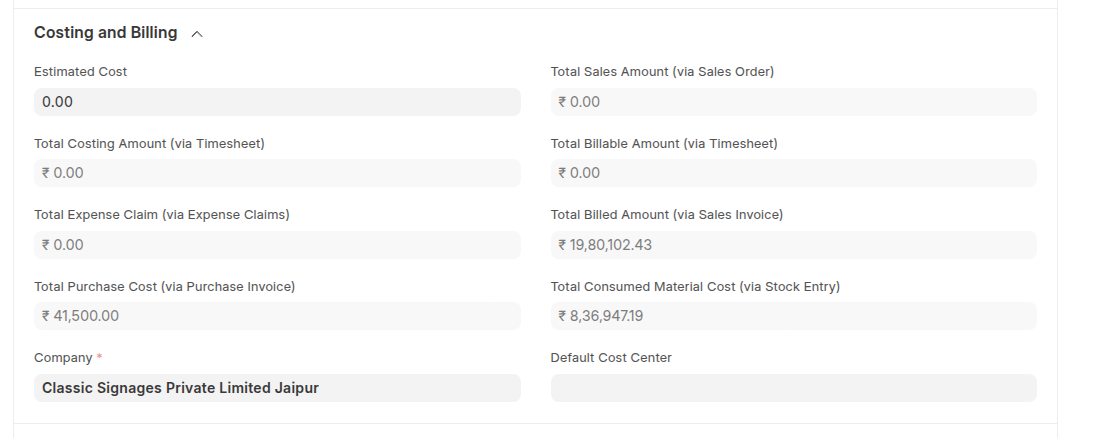
Estimated Cost: Manual, enter the estimated cost of project
Company: select company
Default Cost Center: optional, select default cost center. Use for accounting purpose
Total Costing Amount: Read-only, auto come from time-sheet
*not in use
Total Expense Claim: Read-only, auto come from expense claim
Total Purchase Cost: Read-only, auto come from purchase invoice
Total Sales Amount: Read-only, auto come from sales order
Total Billable Amount: Read-only, auto come from time-sheet
*not in use
Total Billed Amount: Read-only, auto come from sales invoice
Total Consumed Material Cost: Read-only, auto come from stock entry
9. Ninth Section: Margin :

Gross Margin: Read-only, auto come from sales invoice
Gross Margin = Total Billed Amount – Total Expense Claim - Total Purchase Cost – Total Consumed Material Cost
Gross Margin %: Read-only, auto come from sales invoice
Gross Margin % = Gross Margin / Total Billed Amount * 100
10. Tenth Section: Monitor Progress :
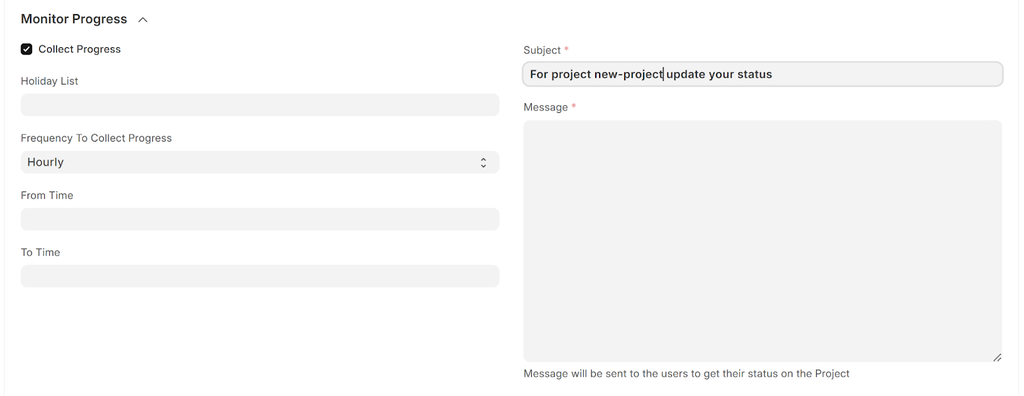
This section sends mail to users that give info related to progress, not used to our organization.
Collect Progress: Checkbox, on select of this it will display all related fields.
Holiday List: select holiday list, related to HR Department
Frequency to Collect Progress: It have four drop-down
Hourly
Twice Daily
Daily
Weekly
as per above drop-down their related fields appear.
Subject: email subject
Message: email body
11. Eleven Section: Project / Shipping address :
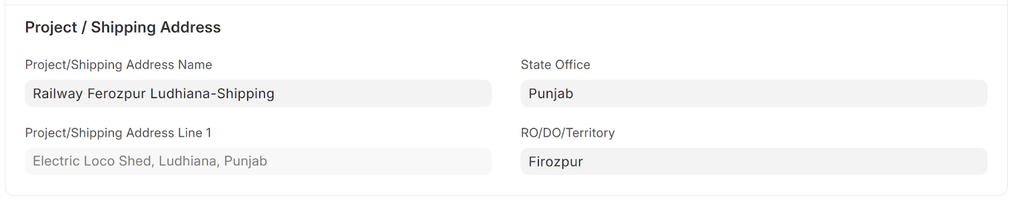
Project / Shipping Address Name: Select address related to project
Project / Shipping Address Line 1: Auto fetch from address
Project / Shipping Address Line 2: Auto fetch from address
State: Auto fetch from address, but able to change it.
RO/DO/Territory: Auto fetch from address, but able to change it.
RO – Regional Office
DO – Divisional Office
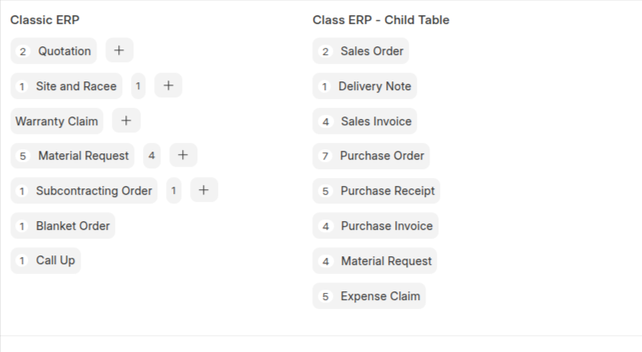
Project Connections:
I have added these two custom connection in project.
First Connection Tab
It has multiple custom connections
- Quotation
- Site and Racee
- Warranty Claim
- Material Request
- Blanket Order
- Call Up
Second Connection Tab :
In this connection it shows the link of all related Doc-types through their respective child table reference.
More articles on ERP Documentation